As with all work on any firearm, "live" or otherwise - SAFETY FIRST! Check that the weapon is unloaded before doing anything else. Find a well lit and stable area to work in with plenty of space.
1. You will need a small flat pointed screwdriver. This should be small and narrow enough to fit the screw slot of the extractor screw. This screw may be quite tight and so a well fitting screwdriver is essential. Check that the blade is not worn smooth and liable to slip. Jamming a screwdriver into your hand is something that you never want to repeat after doing it for the first time! Ideally you will also require a 'Tool, Spring, Extractor No1' for manipulating and fitting the extractor spring. If you do not have, or have access to, one of these, you may find that a snipe nosed pair of pliers will suffice if you have a strong grip, but in this case you will need to have access to a firmly mounted vice with 'soft' jaws. This will make the job easier in all situations in any case.
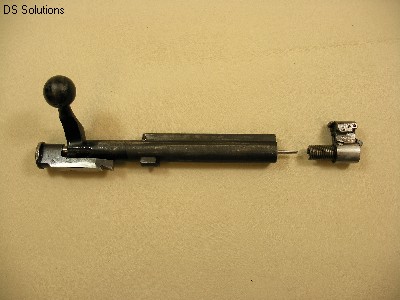
2. Remove the bolt from the rifle and put the rifle to one side. Unscrew the bolt head from the bolt and put the bolt to one side. To strip the extractor, remove the components in the order: a; spring. b; screw, c; extractor. The sequence for fitting and removing an SMLE extractor differs from that of a No4 Series extractor, and whilst the components are similar they differ significantly in detail (see illustration).
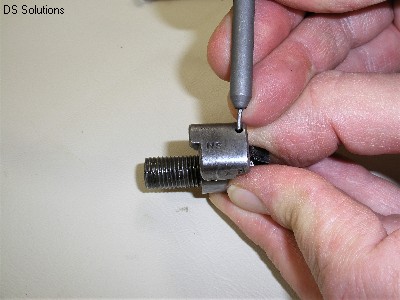
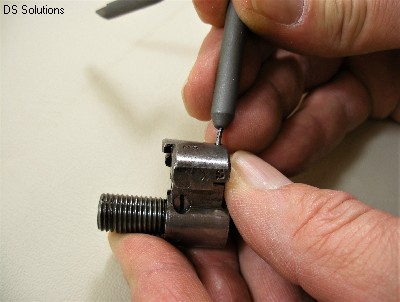
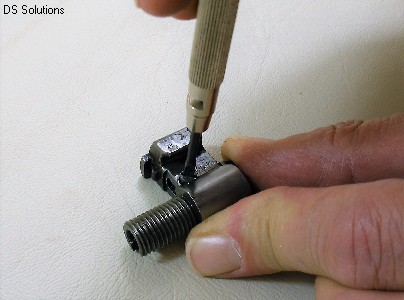
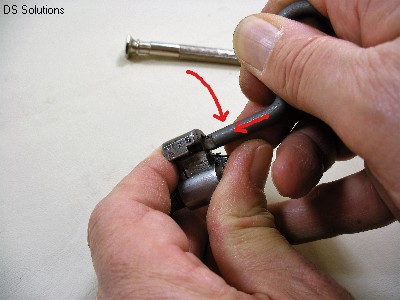
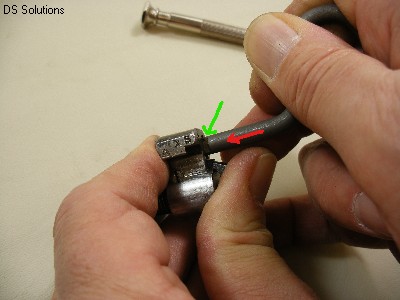
3. To strip the extractor first remove the spring. Use the pin tip of the 'Tool, Spring, Extractor No1' to unseat the spring by pushing it through the hole in the top of the extractor way in the 'wing' of the bolt head. This will compress the spring and free the pin or lug on the spring from it's seat. Warning! If the spring is well lubricated and the extractor way clean, the spring may well launch itself out of the bolt head, either never to be seen again or injuring you on it's bid for freedom! It is a good idea both to keep a finger tip over the open end of the spring to control it, and to ensure that the face of the bolt is not pointing at you just in case. You may wish to wear safety glasses for this. If the extractor way is badly fouled or rusty then it is possible that you may need to use the tip of the screwdriver against the folded part of the spring that protrudes from the rear of the extractor way to push it out of the bolt head. The same precautions apply to controlling the spring - it is a powerful little beast for it's size! Once unseated lift it clear of the bolt head and put it to one side.
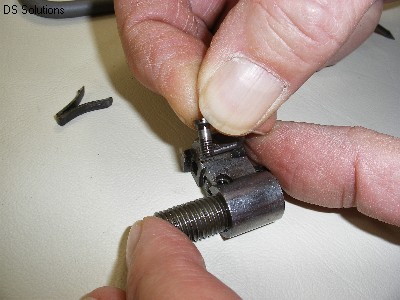
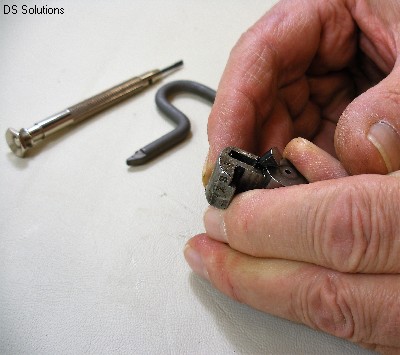
4. The extractor itself can now be removed from the bolt head. Undo the extractor screw. If the bolt head is in a vice then this should present no problems, if not then ensure that the bolt head is placed on a flat firm surface and use firm downward pressure to start the screw. This will ensure that you do not either damage the screw head or should the screwdriver slip out that you do not spear yourself with the screwdriver! Once the screw is fully undone and lifted clear (it is tiny - put it somewhere safe) the extractor can be pulled or tipped out of the bolt head.
5. Visually check the extractor way in the bolt head and remove any build up of dirt or grease (or swarf from the de-ac process if applicable). If the extractor has not been removed for a number of years the extractor way is liable to be at least partially clogged with a mixture of carbon deposits, congealed oil and atmospheric dirt and dust. Take the opportunity to carefully scrape out the deposits with the tip of the screwdriver. You may be surprised to find that what you assumed to be bolt head is in fact a solid build up of debris that can easily be carved out with the screwdriver. If it feels like metal then it probably is metal! No need to take a hammer and chisel to it!!! Once cleaned put a couple of drops of light oil in, it will help later.
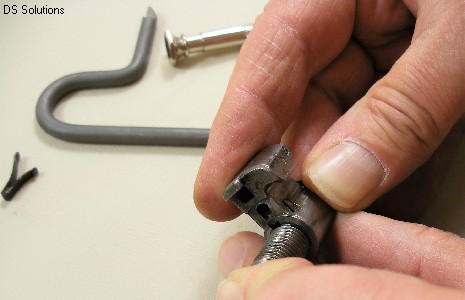
6. Carefully clean the bolt head and the extractor components. Once this is done, refitting the extractor is the reverse process. The job is much easier with the bolt head clamped in a soft jawed vice but it is still possible to do the job safely using a firm hand grip. If clamping the bolt head up in a vice DO NOT clamp onto the threads of the bolt head! Do up the vice enough to keep the bolt head in position but there is no need to flatten the thing! Make sure that the extractor is in the correct orientation with the 'claw' of the extractor towards the firing pin hole in the face of the bolt head. Insert the tail of the extractor into the extractor way and line up the hole on the extractor with the hole for the screw. Insert the screw from the right hand side of the bolt head (as viewed from the back with the 'wing' uppermost) and if not using a vice, place the bolt head on a stable surface (bench or table top) and do up the screw. Screw in until the screw is nipped up with the head flush with or slightly below the surface and hand tight. Check that the extractor moves freely around the screw. It should be 'floppy' with no resistance. If it is tight on the screw or binds in the extractor way then remove it again, check for any damage or burrs and cleanliness of the extractor way. Rectify as necessary or fit new components as required.
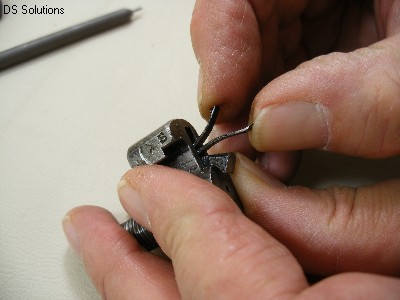
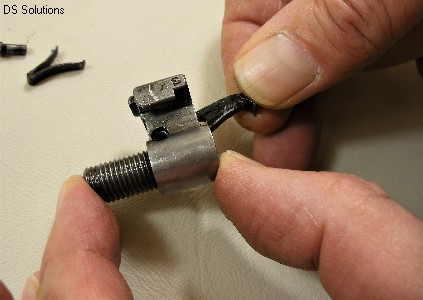
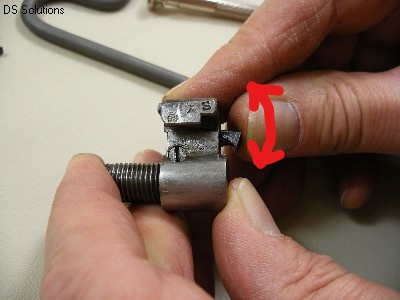
7. The extractor spring can now be fitted. The SMLE extractor spring is a folded 'V' shaped flat spring with 2 arms. The shorter of the 2 arms has a pin or locating lug towards the tip. The spring is inserted into the extractor way from the front with the pin facing away from the top edge of the extractor. Locate the tip of the short arm of the spring in the 'Tool, Spring, Extractor No1' (see illustration) and insert the spring, fold first, into the extractor way with the long arm against the extractor and push back until the locating lug contacts the face of the 'wing' of the bolt. Use the tool to lever down the end of the spring until the locating lug is just below the front face of the 'wing' and push back until the locating lug engages into the locating hole and withdraw the tool. Use thumb pressure to check that the extractor moves under spring tension and the spring does not pop out.
8. Finish up by placing a single drop of oil on the top of the extractor where the spring bears on it and work the extractor with thumb pressure 2 or 3 times to distrubute the oil. Wipe away an excess oil with a clean cloth. Job done! The bolt can now be re-assembled and refitted to the rifle.