Fitting an Extractor to a Lee-Enfield No4 Series Rifle Bolt
1. As with all work on any firearm, ‘live’ or otherwise – SAFETY FIRST. Check that the weapon is unloaded and find a well lit area to work in.
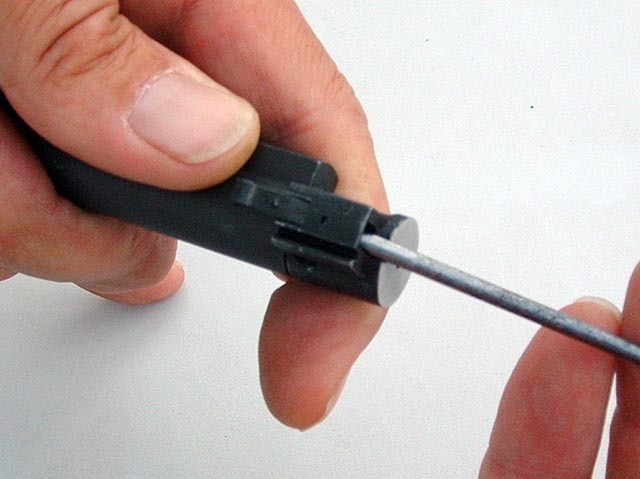
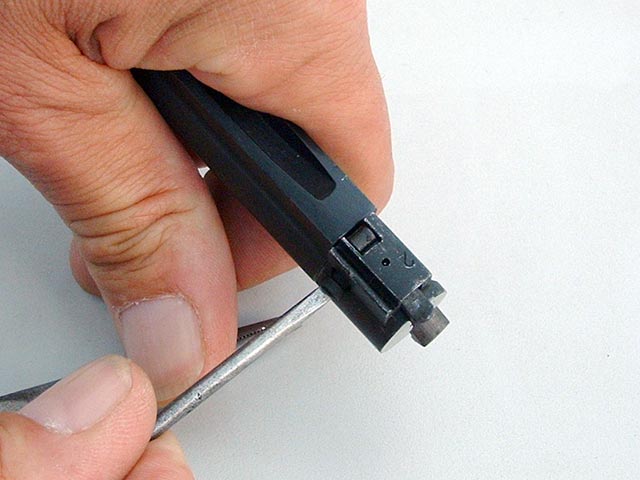
2. You will need a small flat pointed screwdriver. This should be small and narrow enough to fit the screw slot in the extractor screw, this screw will be quite tight so a well fitting screwdriver is essential. Check also that the blade is not worn smooth and liable to slip, an ingrowing screwdriver will not help the process! You may also find a snipe nosed pair of pliers useful and if you have access to a firmly mounted vice with ‘soft’ jaws this will make the job that much easier.
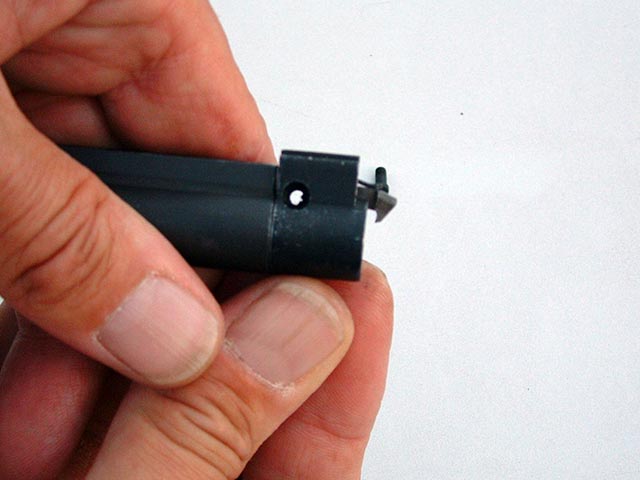
3. Remove the bolt from the rifle and put the rifle to one side. Check the extractor way in the bolt head and remove any build up of dirt, grease or swarf (from the de-ac process). Once clean, if available, clamp the bolt (bolt head uppermost) in the vice. If you do not have access to a vice the job is do-able using a firm hand grip it is just easier with a vice.
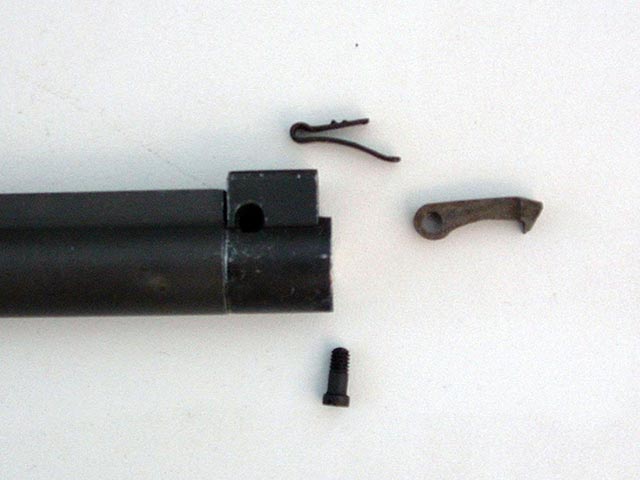
4. The first item to be fitted is the extractor spring. The spring has 2 arms, the shorter of the 2 will be found to have a raised dimple about a half way along it. The spring is inserted into the bolt head from the front with the dimple uppermost. The extractor way in the bolt head will have a small hole drilled in the outer face where the dimple will locate. Position the spring with the fold to the rear and push the spring into the extractor way until it clicks into place. If the fold in the spring insists on tipping down so that it fouls the back of the extractor way (it should push through the hole it the back) just gently ease it up with the screwdriver tip as you push it in from the front. If the extractor way is tight it may be helpful to hold the longer arm of the spring with snipe nosed pliers to insert it into the bolt head.

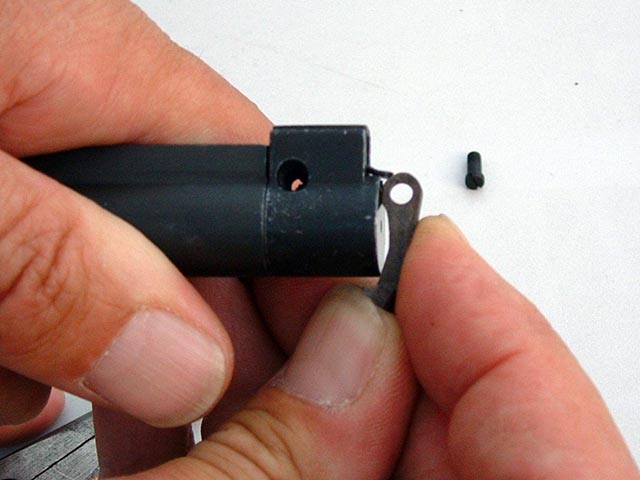
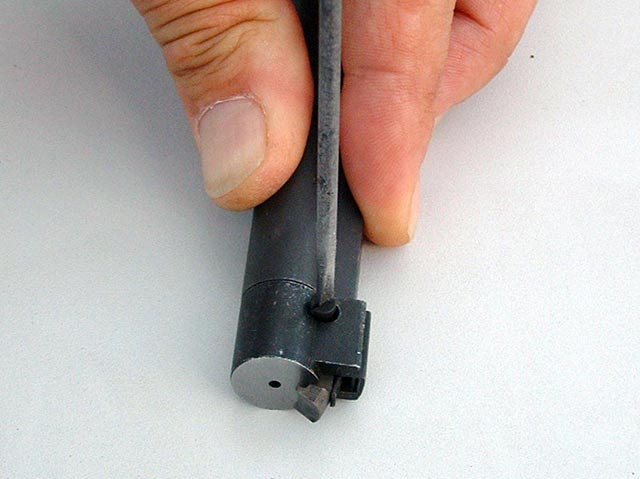
5. Once the spring is located in place the next item is the extractor. Fitting this requires care, slow and sure is the only way. With the front of the bolt uppermost, place the extractor in line with the extractor way and across the face of the bolt head with the claw of the extractor towards the bolt. The closed end of the extractor (with the hole for the screw) is held against the protruding long arm of the spring. Taking care not to slip off push the extractor against the spring until the spring has compressed enough for the closed end of the extractor to be tipped into the extractor way by lifting the claw while pushing back into the bolt head. The spring is quite stiff so as always slow and sure with control. Once this is achieved the extractor can be pushed fully home.
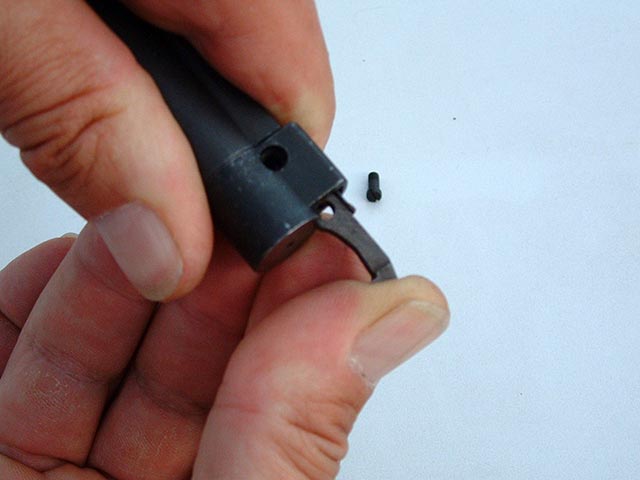
6. Align the extractor with the hole for the screw, insert the screw from the right side of the bolt head and, if not using a vice, place the bolt flat on a stable surface (bench or table top) and screw into place pressing down on the screw towards the surface. Screw in until the head of the screw is fully home (flush or below the surface of the bolt head).
7. Job done! The bolt can now be refitted to the rifle. Should you have need to remove it at any stage removal is the reverse procedure with the exception that the spring is removed through the rear of the bolt head. Attempting to push it forwards will usually result in a broken spring!